I my previous posts I’ve presented my project idea and system design of the SpiderBB project. The next step in my project plan is selecting hardware. In this post, I identify hardware requirements and select hardware based on them.
Hardware requirements
The SpiderBB setup detects motion and noise, sends notifications over a network to the clients, and provides a live stream. Setting up SpiderBB should be easy enough for non-techies as well. Therefore a closed design is a target. Travelling with SpiderBB should be easy as well. The operating system should be mainstream and FOSS to receive proper security patches.
These thoughts lead to some basic hardware requirements, SpiderBB:
- need a camera module and microphone
- need an overall small size
- should be low energy consuming
- runs with a standard Linux OS
- schematics freely available
- affordable for young parents
Selected Hardware
For SpiderBB I need four hardware components.
- small computer
- Camera with night vision
- Battery pack Following I present my decision and try to reason them.
Computer
Small, low energy consumption and standard Linux OS are some of the main selling points of the Raspberry PI product family. 2017 released Raspberry PI Zero W is one of the family’s smallest members. It comes with a built-in W-Lan and camera connector. For a project like SpiderBB the pin header is not needed, so the Zero WH is not required.
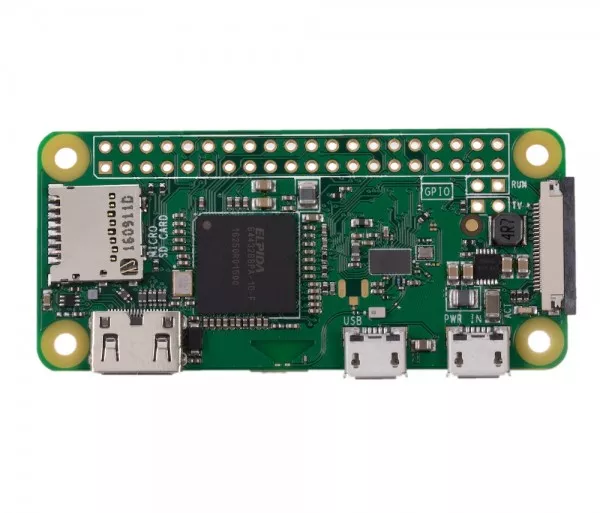
With 160mA at 5V, the Zero W has the lowest energy consumption compared to the other available variants with W-Lan and camera connector, see RaspiTVs measurement from 2017.
Camera
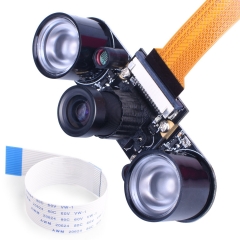
For the CSI camera connector used by the Raspberry PI family, different camera solutions are present. The Raspberry PI product page lists two different camera modules, with and without IR. The NoIR (No IinfraRed) can take pictures in low-light environments. I’ve decided on a compatible solution from Kumantech because this module comes with IR led for the same price, see Kuman for Raspberry PI Camera Module.
Battery Pack
The Raspberry PI family is usually powered with USB, and something above 1.5A is sufficient for nearly every case. Because it would be a bit too much (SO used her veto..) to build my custom battery pack based on modern technology, I’ll use a boring power bank. Luckily my oldest one has similar dimensions to the Zero with the Camera Module.
We’ve got a Prototype, and now?
In this post, I’ve presented my hardware selection and provided some of my thought behind them. With this prototype setup, I can start developing the software beginning with motion detection.
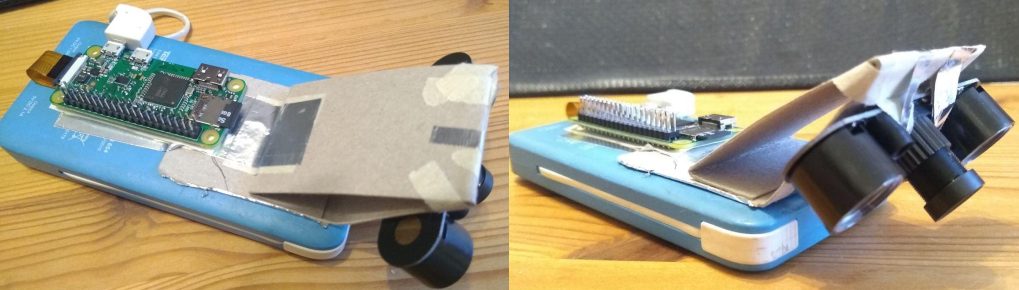
The image shows my prototype set up how it is for a few months. I plan to add housing but let’s see what the time brings since “Nichts hält länger als ein Provisorium” (nothing lasts longer than a temporary solution)..